Crosser Node as Azure Container App
Introduction
Beside running the Crosser Node on a stand-alone Docker setup, or using a container orchestration system like Kubernetes/OpenShift, you can also run the Node as an Azure Container App in your Azure infrastructure. This gives you the advantage of not having to deal with overhead like resources and management of an operating system which hosts the Node. In addition, Azure Container Apps allow you to scale the resources of your container in a smooth and easy way making it highly adjustable for your use case.
Prerequisites
The Crosser Node requires persistent local storage which allows the Node to store log files, settings, deployed flows and other things. If you run the Node as an Azure Container App without persistent storage, the Node will run just fine but it will lose all deployed flows with every restart. To avoid that you will need to add a File Share to your Container AppEnvironment.
Setup
The steps below should be treated as guidelines and you might want to adjust certain settings according to your needs or infrastructure.
Create File Share
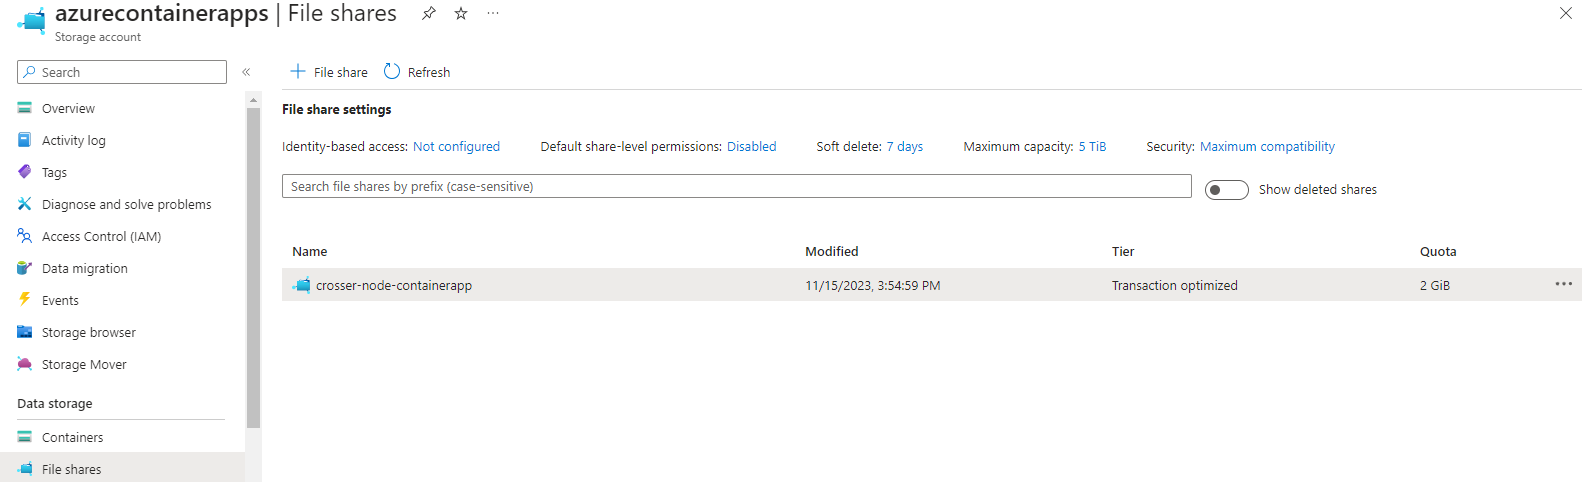
In your Azure portal navigate to ‘Storage Accounts’, add a new storage or use an existing one and add a ‘File Share’ to it. Keep in mind that every Node will require one unique File Share.
On your storage account, move to ‘Access keys’ and show/copy one of the available keys for your storage account.
You will need the ‘Access key’ later on.

Create Container App
In your Azure portal, go to ‘Container Apps’ and click create. Specify the basic settings according to your needs and click ‘Next: Container’.
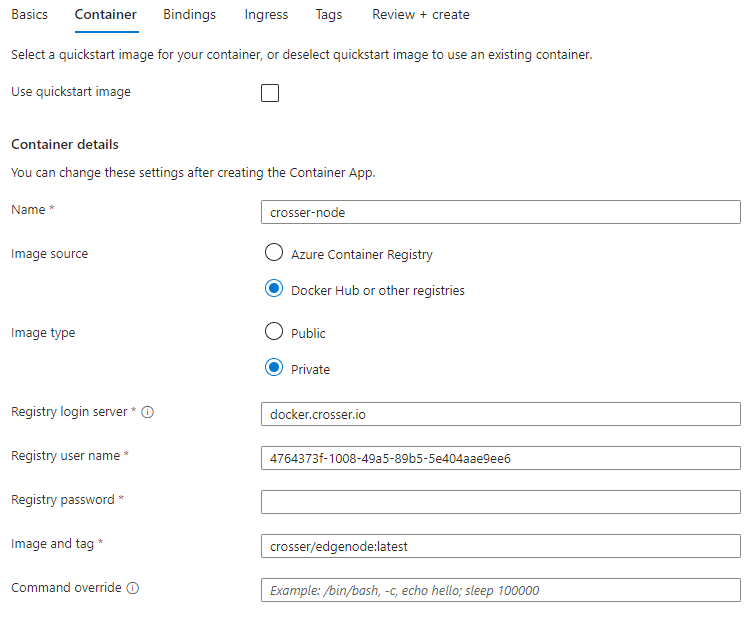
The Crosser Node is available on Crosser’s Docker repository. You can get the credentials for that in Crosser Control Center.
Add the password here as well.
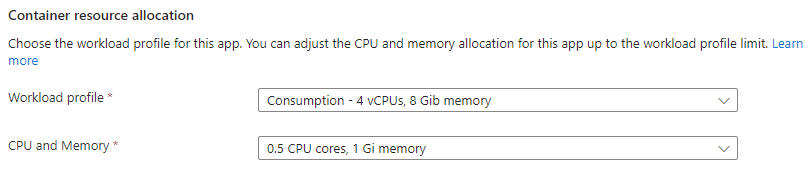
Specify the Container resource allocation according to your needs. With the smallest possible setup (0,5 CPU cures, 1 Gi memory) you can run the Crosser Node.
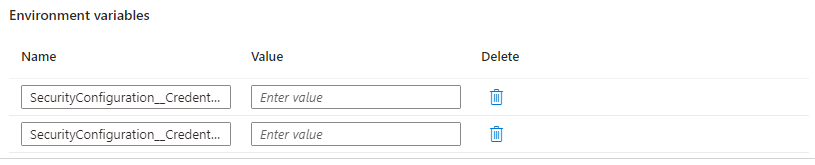
For Environment variables, you have to add at least:
SecurityConfiguration__Credentials__NodeId
SecurityConfiguration__Credentials__AccessKey
NodeID and AccessKey are the Node credentials that you get when creating the Node in your Crosser Control Center organization
If you want to expose ports from the Node, you can specify the Ingress settings according to your needs. By default the Node comes with a webserver and internal MQTT Broker which allow communication to external services.
Port 9090: Default web server for receiving data in Flows using the HTTP Listener module.
Port 9191: Node web UI and monitoring REST API
Port 1883: MQTT Broker
For our basic setup we do not expose any ports.
Follow the next steps and click ‘create’.
Deploy container
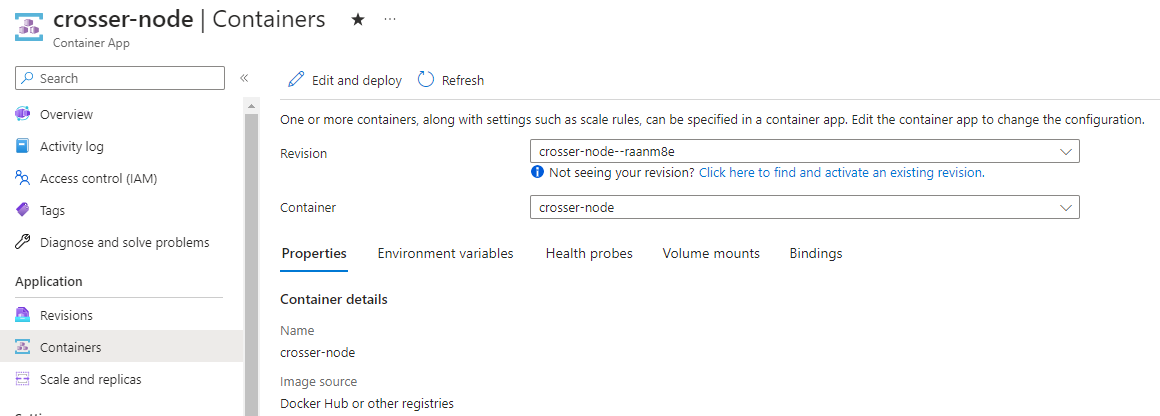
Once the Container App is created, click on the name, navigate to ‘Containers’ and click on ‘Edit and deploy’.
Select the container image and click ‘Edit’

Go to ‘Volume mounts’ and click on the link ‘Container Apps environment’ to define the file share it should be mapped into the container.
Once you are redirected to ‘Container Apps Environment’, go to ‘Azure Files’ and click ‘Add’.
For Name you can specify whatever you want, in our example we go with ‘data’. Specify other settings according to the File Share that was created previously. Make sure you use Read/Write permission.
When created, your share should look something like this:

Afterwards, mount the volume to your container deployment by adding it as shown below.
If desired you can add ‘Health probes’ that check if the container is running properly. To do so, we recommend the settings below.


Now your Setup is completed and you can deploy your Container App.
Verify
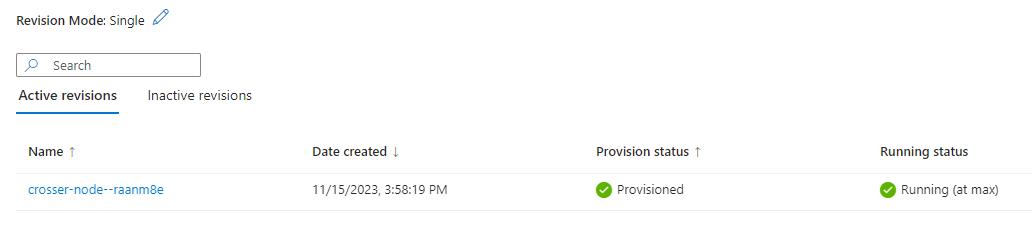
To verify that the container is up and running, you can move to ‘Container Apps’, Application and navigate to ‘Revisions’.
In addition we recommend checking whether or not the Node is shown as online in your Crosser Control Center organization.
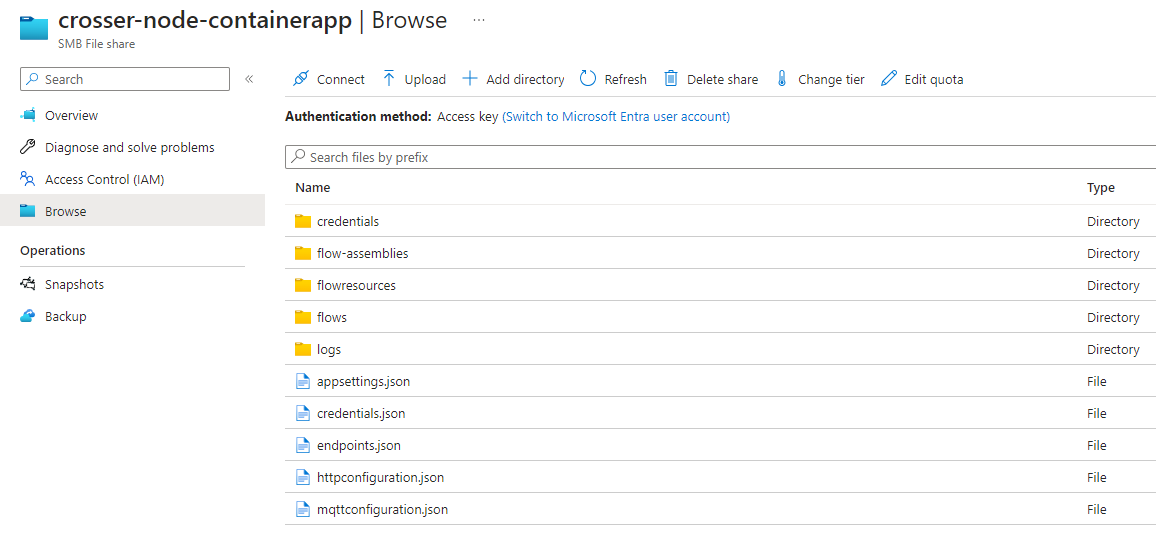
Also, once the Node is running, you should find the usual known folder structure in the File share which was added to the Container deployment.
Related Articles
Node Installation
The first step when installing a local edge Node is to register the Node in Crosser Cloud to get the credentials. This is covered in the In Crosser Cloud section below. There are two options for installing a Crosser Node on a local server: using a ...Crosser Node 2.5.2
Crosser Node 2.5.2 December 7, 2021 Upgraded software to use .NET 6.0 .NET 6.0 is an LTS release, previously .NET 5.0 was used. In general the upgrade is around improved performance and you can read all about it here Recommendations Using Environment ...Node to Node communication
Introduction When talking about digitalization in the industry, security often comes up as one of the main concerns. Usually production environments are decoupled from other areas to prevent unauthorized actions. To realize this, a common practice is ...Crosser Node 2.5.3
Crosser Node 2.5.3 May 2022 Bugfix - Prevent Crash When Getting ChannelClosedExceptions When running remote sessions with unstable network connections the node host process could crash due to not handling a ChannelClosed exception in a proper way.Monitoring the Crosser Node
Introduction Once you have your first flows deployed, you might think about how to integrate the Crosser Node and Flows into your existing monitoring solution. In this article we describe what options you have and how to utilize provided interfaces ...